


Repainting a motorcycle tank can breathe new life into an old bike, transforming its appearance and allowing for a personalized touch. Whether you’re looking to refresh a faded finish or completely change the bike’s aesthetic, understanding the painting process is essential. This step-by-step guide will walk you through the various stages necessary for successfully repainting your motorcycle tank.
The tank, often the most visible part of a motorcycle, plays a crucial role in its overall look. Choosing the right color and finish can enhance your bike’s character. Proper preparation and technique in painting are vital to ensure a durable and professional appearance. This guide will provide you with insights into the tools, materials, and methods needed to achieve a stunning result.
As you embark on this journey of painting your motorcycle tank, it’s important to pay attention to details such as surface preparation, paint selection, and application techniques. By following these carefully outlined steps, you’ll not only improve the aesthetics of your bike but also gain valuable skills that can be applied to future projects. Let’s get started on this exciting transformation!
Preparing Your Motorcycle Tank for Painting
Before diving into the painting process, it is crucial to properly prepare your motorcycle tank. This step ensures that the paint adheres well and results in a smooth and durable finish.
First, remove the tank from your bike. This can typically be done by unscrewing the bolts that hold it in place. Make sure to disconnect any fuel lines and electrical connections safely, taking care to prevent spills.
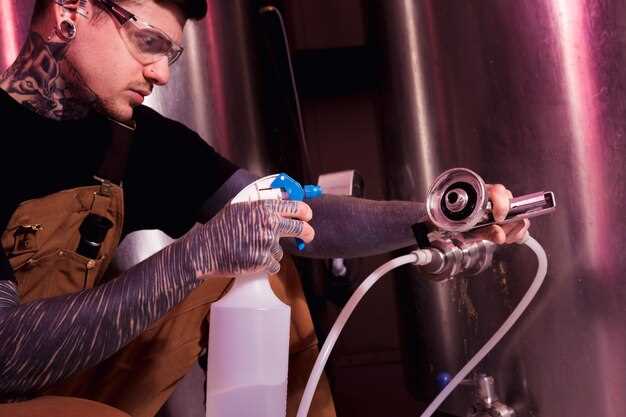
Next, clean the surface of the tank thoroughly. Use a mixture of soap and water to wash away dirt, grease, and old wax. After washing, rinse with clean water and dry it completely. For best results, you can also use a degreaser to remove any stubborn residues.
Once the tank is clean, you will need to sand the surface. Start with medium-grit sandpaper and gradually move to finer grits. This process helps to create a smooth surface and a better bond for the paint. Pay special attention to any scratches or imperfections, ensuring they are adequately smoothed out.
After sanding, wipe down the tank using a tack cloth to remove any dust particles generated by the sanding process. This step is essential to prevent dust from settling on the freshly painted surface.
If your tank has any rust spots, make sure to treat them using appropriate rust converters or by sanding them down until smooth. Ensure that the tank is in good condition, as damage can affect the final appearance of your painting job.
Finally, consider applying a primer specific for metal surfaces. Priming will help the paint adhere better and provide an even base for your chosen paint color. Allow the primer to dry completely before proceeding with the actual painting.
With these steps completed, your motorcycle tank will be ready for the painting process. Proper preparation not only enhances the finish but also prolongs the life of your bike’s tank.
Selecting the Right Paint and Supplies for Classic Bikes
When repainting a motorcycle tank, particularly for classic bikes, choosing the right paint and supplies is essential for achieving a durable and visually appealing finish. The finished look not only reflects the bike’s style but also protects the tank from various elements.
First, consider the type of paint. For classic motorcycles, two-component polyurethane paints are often recommended. These paints provide superior durability and gloss retention compared to traditional enamels. Additionally, they offer excellent resistance to fuel and chemicals, crucial for a motorcycle tank that may face spills.
Next, choose the right color. Many classic bikes benefit from original factory colors or vintage shades, so researching to find the correct color code can enhance authenticity. Look for specific paint lines that cater to classic vehicles, as these often have an array of historical colors suitable for restoration projects.
Supplies needed for the painting process include high-quality primers and clear coats. A good primer helps in adhesion and provides a smooth base for your topcoat. A clear coat is vital to protect the paint from UV damage and scratches, ensuring a long-lasting finish.
Don’t forget about application tools. Invest in high-quality spray guns or aerosol cans designed for automotive use. If using a spray gun, ensure you have the appropriate air compressor and filters to avoid contamination in your paint. Additionally, essential supplies such as sandpaper, masking tape, and clean cloths will help prepare the tank properly before painting.
Lastly, consider the safety gear. Always wear a respirator and gloves while working with paints and solvents. Proper ventilation in your workspace is also crucial to avoid inhaling harmful fumes during the painting process.
By selecting the right paint and supplies, you can ensure that your classic bike tank not only looks fantastic but also stands the test of time on the road.
Applying Paint and Finishing Touches for a Professional Look
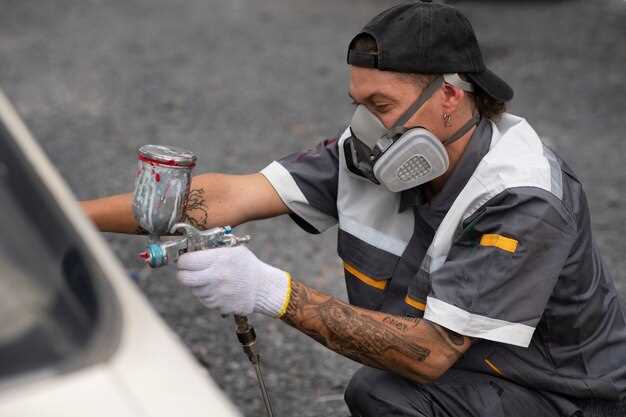
Once you have prepared your motorcycle tank, the next crucial step is the painting process. Start by choosing high-quality automotive paint that is specifically designed for metals. This will ensure durability and a vibrant finish.
Before you begin spraying, make sure your workspace is well-ventilated to avoid inhaling any harmful fumes. Use a spray gun or aerosol can to apply the paint evenly, holding it about 6-12 inches away from the surface of the tank. Start with light coats, applying 2-3 layers while allowing adequate drying time between each coat. This technique helps to prevent runs and achieves a smoother finish.
After the base coat has dried, you can apply a clear coat to add depth and protection to your paint job. Choose a clear coat that is compatible with your base paint. Similarly to the base coat, apply this in thin, even layers and allow it to cure properly.
Once the clear coat is fully cured, it’s time for finishing touches. Inspect the tank for any imperfections–small dust particles or paint inconsistencies may require light sanding with fine-grit sandpaper. After sanding, polish the surface with a soft cloth to restore the shine.
Finally, don’t forget to add graphics or decals if desired. Ensure these are applied smoothly without any air bubbles, and seal them with an additional layer of clear coat for ultimate durability. Following these steps will ensure your motorcycle tank looks professional and stands out on the road.


