For every rider who values performance and comfort, maintaining your ATV is essential to ensure an enjoyable experience on the trails. As equipment ages, grips and controls can wear down, directly affecting not just handling but also your overall riding pleasure. Worn-out grips can lead to discomfort and even loss of control, making it crucial to address these issues promptly.
Replacing worn-out grips and controls not only enhances the comfort of the ride but also significantly improves the safety and responsiveness of your equipment. Taking the time to upgrade these components can result in a more engaging and confident riding experience, allowing you to fully appreciate the capabilities of your ATV. It’s an investment in both your safety and enjoyment as a rider.
In this article, we will explore the various signs that indicate it’s time for a replacement, the types of grips and controls available, and tips for ensuring a proper installation. By the end, you will be equipped with the knowledge to enhance your ATV’s performance and make each ride as pleasurable as possible.
Identifying Signs of Wear on ATV Controls
Regular inspection of ATV controls is essential for maintaining comfort and ensuring a safe riding experience. Over time, various factors contribute to wear and tear on these important components. Recognizing the signs of wear can help you take timely action, preventing safety issues and enhancing performance.
One of the primary indicators of wear on ATV controls is the deterioration of the rubber grips. Check for cracks, tears, or a loss of tackiness. Damaged grips can lead to reduced control, making it difficult to operate the ATV smoothly. A worn grip can also cause discomfort, leading to fatigue during extended rides.
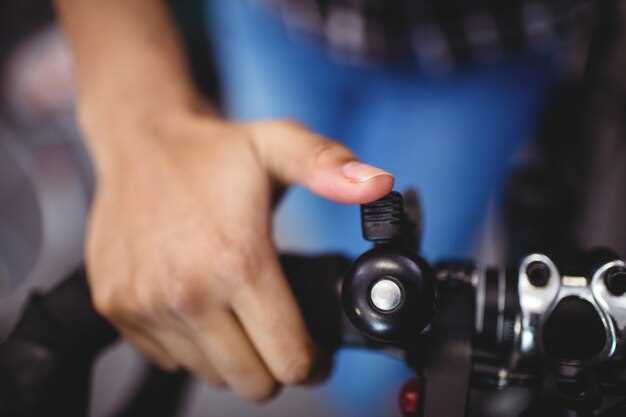
Additionally, observe the throttle and brake levers for any signs of looseness or irregular movement. If these controls feel wobbly or tend to stick, it may signal wear or the need for lubrication. Smooth operation is crucial; hesitations or unresponsive controls compromise both comfort and safety.
Furthermore, ensure that all switches, including the ignition and lights, are functioning properly. Difficulty in activating or deactivating these controls may indicate wear or dirt buildup. Regular cleaning and inspection can prevent issues, ensuring that all controls respond promptly when you need them.
Lastly, it’s important to inspect the cables connected to your ATV controls for fraying or corrosion. Damaged cables can impede functionality, affecting your ability to react quickly in various situations. Replacing worn cables not only restores comfort but also prevents potential accidents.
Selecting the Right Grips for Enhanced Rider Comfort

Choosing the appropriate grips for your equipment is crucial for improving overall rider comfort and control. The right grips not only enhance your grip on the controls but also reduce fatigue during long rides. To select the best grips, consider the following factors:
Material: Grips are typically made from rubber, foam, or silicone. Rubber grips offer durability and weather resistance, while foam grips provide a softer feel and better shock absorption. Silicone grips combine the best of both worlds but may have varying levels of grip strength depending on texture.
Diameter: The diameter of the grip can significantly impact comfort. Thicker grips may be more comfortable for riders with larger hands, as they reduce the effort required to hold on. Conversely, smaller grips may be ideal for those with smaller hands, providing better control over the equipment.
Texture: The surface texture of the grips can greatly affect how well you can control your equipment. Textured grips offer increased traction, allowing for a more secure hold, while smooth grips may feel comfortable but can lead to slipping in wet conditions.
Shape: The ergonomic shape of grips can enhance comfort by conforming to the natural contours of your hands. Some grips are designed with contours and ridges that offer additional support, which can alleviate strain on your hands and wrists during extended use.
Personal Preference: Ultimately, rider comfort is subjective. It is advisable to test different grips to find your preferred style. Consider factors such as how the grip feels during use, its compatibility with your riding style, and how well it complements the controls of your equipment.
By carefully evaluating these aspects, you can select grips that not only improve rider comfort but also enhance your interaction with the controls, leading to a more enjoyable riding experience.
Step-by-Step Guide to Installing New Controls on Your ATV

Installing new controls on your ATV is an essential maintenance task that enhances the rider’s experience and ensures safe handling. This guide provides a straightforward process to help you replace the worn-out controls effectively.
Step 1: Gather Required Tools and Materials
Before starting, collect all necessary tools, including a socket set, screwdrivers, pliers, and a torque wrench. Ensure you have the new controls compatible with your specific ATV model.
Step 2: Disconnect the Battery
For safety, disconnect the ATV battery before beginning. This will prevent any electrical shocks or short circuits during the installation process.
Step 3: Remove Old Controls
Carefully remove the old controls from the handlebars. Use the appropriate screwdriver or socket to unscrew the mounting brackets. Take note of the arrangement of wires for reference when installing the new controls.
Step 4: Install New Controls
Position the new controls in the same location as the old ones. Secure them using the original mounting brackets and screws. Make sure they are tightly fastened, but avoid over-tightening as this may damage the components.
Step 5: Reconnect the Wiring
Reconnect the wiring to the new controls by following the reference taken during the removal. Ensure all connections are secure and properly insulated to prevent any electrical issues.
Step 6: Reconnect the Battery
Once all components are installed and connected, reconnect the battery. Double-check all wiring and controls to ensure everything is in place.
Step 7: Test the Controls
Before taking your ATV for a ride, test the new controls while the ATV is stationary. Check for proper function of throttle, brakes, and any additional features. Ensure everything operates smoothly and within comfortable reach of the rider.
Step 8: Take a Test Ride
After confirming that the controls function correctly, take your ATV for a short test ride. This real-world evaluation will ensure that the new controls meet your expectations and enhance your riding experience.
By following these steps, you can successfully install new controls on your ATV, ultimately improving safety and ride quality for every adventure.


