


Lowering your motorcycle can significantly enhance your riding experience, providing better stability and confidence on the road. One of the most effective methods to achieve this is by using a lowering kit, which alters the bike’s suspension geometry to reduce its ride height. This modification not only offers aesthetic appeal but also improves accessibility for riders who may struggle to flat-foot their bike.
Understanding Suspension Mods is crucial for anyone considering a lowering project. A properly executed suspension mod ensures that your motorcycle retains optimal handling characteristics while accommodating a lower center of gravity. This adjustment can drastically change the dynamics of your bike, leading to a more comfortable and controlled ride.
In this article, we will explore the essential steps involved in adjusting your motorcycle suspension for a lower ride, the components of a lowering kit, and the potential implications of this modification on your motorcycle’s performance. Armed with the right knowledge, you’ll be well on your way to enjoying a customized riding experience tailored to your needs.
Choosing the Right Lowering Kit for Your Motorcycle Model
Selecting the appropriate lowering kit for your motorcycle model is crucial for achieving the desired stance and handling characteristics. Each motorcycle has specific requirements that must be met to ensure optimal performance and safety. Before making a purchase, consider the following factors:
1. Motorcycle Model Compatibility: Not all lowering kits are universal. Ensure that the kit you choose is designed specifically for your motorcycle model. Manufacturer specifications will provide insights into compatibility, which can affect installation and performance.
2. Suspension Type: Understand the type of suspension system your motorcycle utilizes–whether it’s a sportbike, cruiser, or touring bike. Different types of lowering kits are available, such as those that replace shock absorbers or those that adjust the linkage. Select a kit that aligns with your motorcycle’s suspension design to maintain stability and safety.
3. Drop Height: Lowering kits come with varying drop heights, typically ranging from 1 inch to 3 inches or more. Consider how low you want your motorcycle to sit and how this adjustment will affect your riding experience. A greater drop may enhance aesthetics but can also impact suspension travel and ride quality.
4. Quality and Materials: Look for lowering kits made from high-quality materials that ensure durability and reliability. Avoid budget kits that may compromise safety. Investing in a reputable brand can lead to a more satisfying riding experience.
5. Installation Process: Evaluate whether you can install the kit yourself or if professional installation is necessary. Some kits may require advanced mechanical skills or special tools, so factor in potential labor costs and your own capabilities.
6. Adjustability: Some lowering kits offer adjustable features allowing you to modify the drop height as needed. This versatility can be beneficial if you want to experiment with different stances or if you plan to switch between different riding styles.
By carefully considering these factors when choosing a lowering kit, you can achieve a personalized stance for your motorcycle that enhances both its appearance and rideability while ensuring safety on the road.
Step-by-Step Guide to Installing Suspension Modifications
Installing a suspension modification kit for lowering your motorcycle can enhance both comfort and performance. Follow this step-by-step guide to ensure a successful installation.
Step 1: Gather Necessary Tools and Parts
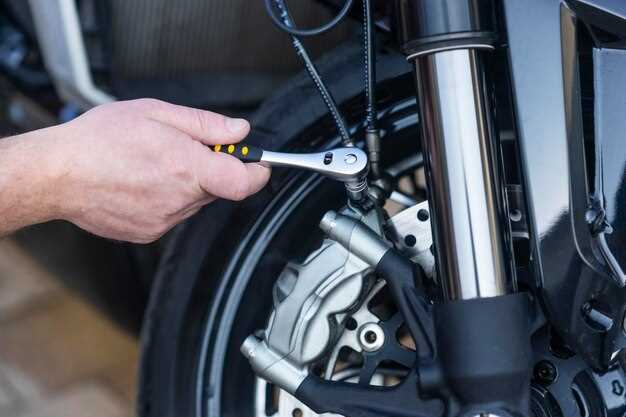
Before you start, make sure you have all the necessary tools including a socket set, wrench set, torque wrench, and a bike stand. Also, ensure you have your suspension lowering kit and any additional mods needed for your specific motorcycle model.
Step 2: Prepare Your Motorcycle
Place your motorcycle on a stable bike stand to prevent it from falling over during the installation. Ensure the bike is cool and secure.
Step 3: Remove the Old Suspension Components
Start by loosening the bolts that hold the existing suspension components in place. This may include the fork caps, rear shock absorbers, and any linkage components. Carefully remove these parts and set them aside, ensuring you keep all hardware organized.
Step 4: Install the Lowering Kit
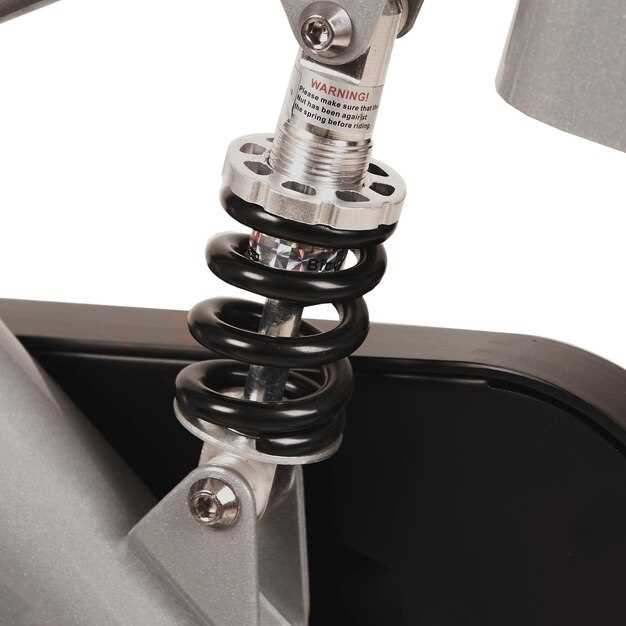
Follow the specific instructions provided with your lowering kit. Typically, you will need to replace the fork springs or adjust the preload on the rear shock. Make sure to attach the new components securely, using the correct torque specifications to avoid any potential issues.
Step 5: Adjust the Ride Height
Once the new components are in place, make the necessary adjustments to achieve your desired ride height. This may involve changing the preload settings or repositioning the shock linkage. Be precise, as the right height will improve overall handling.
Step 6: Check Alignment and Clearance
After installation, check the alignment of the wheels and ensure there is adequate clearance with the fenders. Test the bike’s balance to make sure it’s stable and safe to ride.
Step 7: Take a Test Ride
Before hitting the road, take a slow test ride in a controlled environment. Pay attention to how the bike handles and any unusual noises. If everything feels right, you’re ready to enjoy your newly lowered ride.
Step 8: Final Inspection
After your test ride, conduct a final inspection of all components ensuring bolts are tight and nothing has come loose. Regularly check the suspension after modifications as part of your maintenance routine.
Tuning Your Motorcycle’s Handling After Lowering the Stance
After lowering the stance of your motorcycle using a suspension kit, it’s crucial to make adjustments to ensure optimal handling and performance. A lower ride height can affect various aspects of your bike’s dynamics, including cornering stability and ride feel.
First, assess the bike’s geometry changes. Lowering the suspension shifts the center of gravity, which can lead to quicker steering response. To counter this, you may need to adjust the front fork height in the triples, allowing for a more balanced feel when cornering. Aim for a slight forward weight bias to maintain traction during aggressive maneuvers.
Next, consider adjusting your suspension’s preload and dampening settings. With a lower stance, you may find that the stock settings are too rigid. Reducing preload on both the front and rear can provide a softer ride, enhancing comfort and grip. Ensure you test ride and fine-tune these settings for your specific riding style and conditions.
Don’t overlook tire pressure and selection. A lower stance can change how the tires make contact with the road. Ensure your tires are set to the correct pressure, and consider using tires with profiles optimized for lowered bikes to enhance grip and responsiveness.
Lastly, communicate with fellow riders or professional tuners who have experience with mods similar to yours. They can provide insights and tips that can aid significantly in enhancing the handling characteristics post-modification. With the right adjustments, you can enjoy a lower motorcycle stance without compromising safety and performance.


