


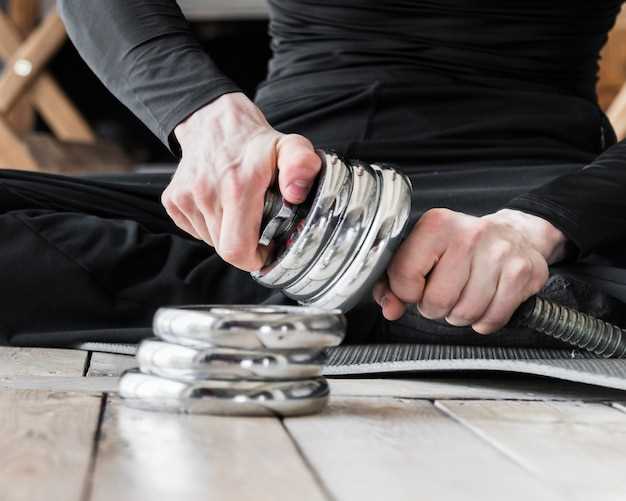
The importance of a well-functioning drivetrain in your ATV cannot be overstated, as it directly affects performance, power transfer, and overall riding experience. One critical component of the drivetrain is the clutch, which plays a vital role in managing the power from the engine to the wheels. Over time, wear and tear can lead to clutch failure, resulting in decreased efficiency and potential damage to other drivetrain components.
This comprehensive guide is designed to walk you through the process of replacing your ATV clutch, ensuring that you can restore your vehicle’s performance and maintain the integrity of your drivetrain. With step-by-step instructions, you’ll be equipped to tackle this essential maintenance task confidently. Whether you’re a seasoned mechanic or a novice enthusiast, understanding how to replace your ATV clutch is crucial for long-term sustainability and optimal performance.
Before diving into the replacement process, it is essential to gather the necessary tools and materials, as well as to familiarize yourself with the specific clutch system of your ATV model. By following this guide, you will enhance your ATV’s reliability and extend its lifespan, allowing you to enjoy thrilling rides without the worry of drivetrain issues.
Identifying the Signs of a Failing ATV Clutch

Recognizing the signs of a failing ATV clutch is crucial for timely replacement and optimal performance. One of the most common indicators is slipping; if the engine revs higher without a corresponding increase in speed, the clutch may not be engaging properly. This can lead to decreased acceleration and power transfer.
Another sign to watch for is a burning smell, often caused by excessive friction when the clutch fails to disengage fully. This occurs when the plates overheat, potentially resulting in permanent damage if not addressed promptly. Listen carefully for unusual noises, such as grinding or rattling sounds, which may indicate worn components within the clutch assembly.
Difficulty shifting gears is also a key symptom. If you experience resistance or a delayed response when changing gears, it could signify that the clutch is not functioning as it should. Additionally, if the clutch lever feels stiff or too loose, it may be time for a thorough inspection or replacement.
Finally, observe the overall performance of your ATV under various conditions. If you notice a decline in responsiveness, especially during acceleration or while traversing rough terrain, the clutch’s effectiveness may be waning. Addressing these signs early on can prevent more extensive repairs down the line and ensure your ATV operates smoothly.
Step-by-Step Procedure for Removing the Old Clutch
Removing the old clutch from your ATV is a crucial step in the replacement process. Follow these steps to ensure a smooth removal:
1. Prepare Your Workspace: Begin by selecting a clean, well-lit area to work. Gather all necessary tools including a socket set, screwdrivers, and a torque wrench.
2. Disconnect the Battery: Safety is paramount. Disconnect the negative terminal of the battery to prevent any electrical shorts during the removal process.
3. Access the Clutch Cover: Depending on your ATV model, you may need to remove components such as the foot pegs or exhaust system to access the clutch cover. Carefully take off any parts obstructing the cover.
4. Remove the Clutch Cover Bolts: Using the appropriate socket, remove the bolts securing the clutch cover. Keep track of these bolts for reinstallation later.
5. Take Off the Clutch Cover: Gently pull the clutch cover away from the engine case. If it’s stuck, tap it lightly with a rubber mallet to break any seals.
6. Inspect the Clutch Components: Before removing the clutch itself, examine the components for wear or damage. This will help you understand the condition of the assembly and part that needs replacement.
7. Remove the Clutch Assembly: Locate the bolts or nuts securing the clutch assembly to the engine. Carefully unscrew these fasteners and lift the clutch off the shaft. Pay attention to any springs or spacers that may also need to be removed.
8. Clean the Area: Before proceeding to install the new clutch, clean the area where the old clutch was mounted. Remove any dirt, debris, or old gasket material to ensure a proper seal with the new replacement.
By following these steps, you will successfully remove the old clutch, setting the stage for a seamless replacement with a new one. Ensure to handle all components with care and consult your ATV’s service manual for specific guidance related to your model.
Installing the New Clutch: Tips and Best Practices
When replacing the clutch on your ATV, proper installation is crucial to ensure optimal performance and longevity of the drivetrain. Here are essential tips and best practices to guide you through the process.
1. Preparation is Key
Before starting the installation, gather all necessary tools and materials. This includes your new clutch, a torque wrench, sockets, and any specific tools recommended by the manufacturer. Having everything organized will save time and reduce frustration during the process.
2. Clean the Components
Make sure to clean all contact surfaces thoroughly before installing the new clutch. Remove any dirt, grease, or old gasket material from the clutch basket and housing. This ensures a proper seal and prevents any contaminants from affecting the new components.
3. Aligning the Clutch
During installation, carefully align the clutch components to avoid misalignment, which can lead to premature wear or failure. Ensure that the splines and mounting points match perfectly. A well-aligned clutch will enhance the efficiency of the drivetrain.
4. Torque Specifications
Always adhere to the manufacturer’s torque specifications when tightening clutch bolts. Using a torque wrench, apply the correct amount of pressure to prevent over-tightening or under-tightening, both of which can cause serious issues during operation.
5. Double Check Installation
After you’ve installed the clutch, double-check all connections and ensure everything is secured properly. Look for any signs of potential issues, such as unusual gaps or misalignments.
6. Test the Clutch Operation
Once installed, test the clutch operation before taking your ATV for a ride. Engage and disengage the clutch multiple times to ensure it operates smoothly without sticking or slipping. Listening for any unusual noises during this test can also indicate potential problems.
7. Follow Break-In Procedures
Refer to your manufacturer’s guidelines for any break-in procedures specific to the new clutch. Proper break-in practices can significantly extend the life of your clutch and improve its performance.
By following these tips and best practices, you can ensure a successful clutch replacement, enhancing your ATV’s drivetrain performance and reliability.


