


Upgrading to a custom exhaust system is one of the most effective ways to enhance your vehicle’s performance, aesthetics, and sound. A well-designed exhaust system not only improves the engine’s efficiency but also allows car enthusiasts to personalize their ride. This guide will walk you through the process of installing a custom exhaust system, allowing you to achieve the perfect balance of performance tuning and auditory satisfaction.
When it comes to vehicle tuning, the exhaust system plays a crucial role. It affects how exhaust gases flow out of the engine and can significantly impact horsepower and torque. By installing a custom exhaust, you can optimize these factors, unlocking your engine’s true potential. Moreover, a custom exhaust system allows you to tailor the sound of your vehicle, whether you prefer a deep, aggressive roar or a subtle, refined note.
Before diving into the installation process, it’s essential to prepare for the task ahead. Selecting the right materials and understanding the proper techniques will ensure a successful and lasting installation. Additionally, having the right tools at your disposal will make the process smoother and more enjoyable. Following this guide will provide you with all the information you need to confidently install a custom exhaust system that meets your performance and sound preferences.
Choosing the Right Exhaust Components for Your Vehicle
When it comes to tuning your vehicle’s performance, selecting the correct exhaust components is essential. The exhaust system significantly affects engine efficiency, noise levels, and overall power output. To achieve optimal results, consider the following components carefully.
1. Headers: Upgrading to high-performance headers can enhance exhaust flow, reducing back pressure and improving engine response. Look for headers made from durable materials, such as stainless steel, to ensure longevity. Consider whether you want short or long tube headers, as each offers different performance characteristics.
2. Exhaust Pipes: The diameter of the pipes in your exhaust system can greatly impact performance. A larger diameter typically allows for better flow but may result in a loss of low-end torque. Choose a diameter that balances power needs across your vehicle’s RPM range, ensuring an improved performance without compromising drivability.
3. Mufflers: Mufflers play a crucial role in sound and back pressure management. Performance mufflers are designed to reduce restriction, allowing for smoother exhaust flow while providing a more aggressive sound. Decide on the type of sound you desire–whether it be a deep, throaty rumble or a more subdued tone–before making your selection.
4. Catalytic Converters: High-flow catalytic converters can help enhance exhaust flow while still meeting emissions standards. When replacing your stock catalytic converter, ensure that it is compatible with your vehicle’s system and meets local regulations.
5. Exhaust Tips: While they may seem purely aesthetic, exhaust tips can also slightly influence exhaust flow and sound. Choose tips that match your vehicle’s style, but consider the shape and size to optimize performance and aesthetics concurrently.
Before proceeding to install your new exhaust components, ensure they are compatible with your vehicle’s make and model. Proper installation and alignment are crucial for maximizing performance and preventing exhaust leaks. By carefully choosing each component, you can create a custom exhaust system that enhances your vehicle’s performance and sound.
Step-by-Step Process for Exhaust System Installation
Installing a custom exhaust system can significantly enhance your vehicle’s performance and change its sound profile. Follow these steps to successfully install your new exhaust system.
Step 1: Gather Your Tools and Materials
Before starting, ensure you have all necessary tools, including a jack, jack stands, wrenches, a saw, and a torque wrench. Additionally, have your new exhaust system components ready to install.
Step 2: Prepare the Vehicle
Park your vehicle on a flat surface and engage the parking brake. Use a jack to lift the rear end of the vehicle and secure it with jack stands. Always ensure safety first before working underneath the vehicle.
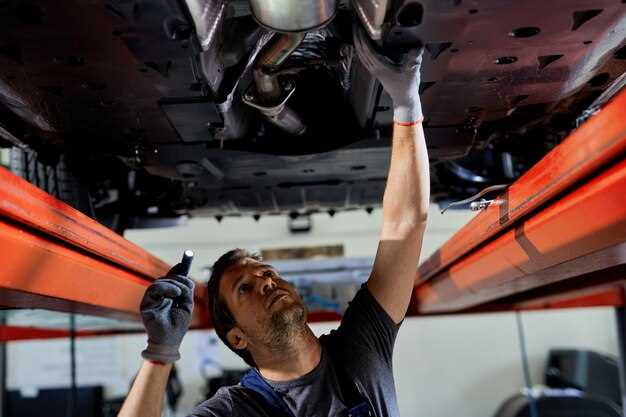
Step 3: Remove the Old Exhaust System
Start by loosening clamps and bolts that secure the existing exhaust system. Cut any welded sections with a saw if necessary. Carefully detach the old exhaust from its hangers and remove it entirely from the vehicle.
Step 4: Clean the Exhaust Flange
Before installing the new exhaust system, clean the exhaust flange on the engine to ensure a proper seal. Remove any rust, debris, or leftover gasket material to facilitate a smooth fit.
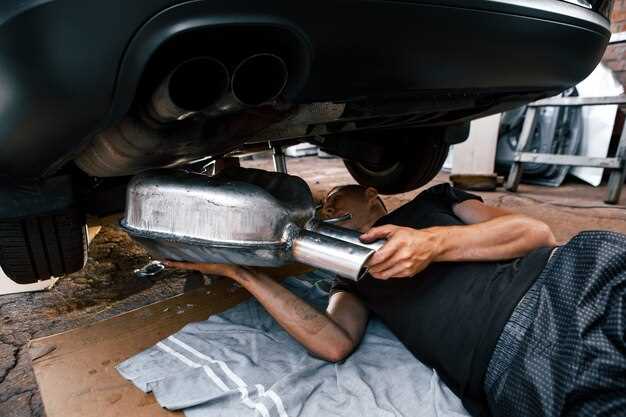
Step 5: Install the New Exhaust Components
Begin with the headers or downpipe, securing them with provided gaskets and bolts. Follow the layout of your new exhaust system carefully, connecting each section sequentially. Use hangers to support the system as you go to ensure proper alignment.
Step 6: Tighten All Connections
Once all components are in place, make sure to gradually tighten all bolts and clamps to the manufacturer’s specifications. This ensures that the exhaust system is both secure and leak-free.
Step 7: Test for Leaks and Sound
Start your vehicle and listen for any unusual sounds or exhaust leaks. Inspect all joints and connections for any signs of escaping gases. If everything sounds good and there are no leaks, your installation is complete.
Step 8: Lower the Vehicle
Carefully lower the vehicle back to the ground and remove the jack stands. Take your vehicle for a test drive to experience the new sound and performance of your custom exhaust system.
Tuning Exhaust Sound: Adjustments and Techniques
Tuning the sound of your exhaust system is an essential aspect of customizing your vehicle. The exhaust note can significantly impact the driving experience, enhancing both performance and aesthetics. There are several adjustments and techniques to achieve the desired sound profile for your car.
One of the primary methods for tuning exhaust sound is selecting the right components. Mufflers play a crucial role in sound modification; for instance, a performance muffler typically produces a deeper, more aggressive tone compared to stock mufflers. Consider designs like straight-through or chambered mufflers to achieve different sound characteristics.
Another technique involves adjusting exhaust pipe diameter. A larger diameter pipe can produce a louder and more aggressive sound, while a smaller diameter can create a quieter tone. It’s essential to consider the engine’s performance when changing pipe sizes, as too large a diameter can reduce back pressure, impacting torque.
Resonators are additional components that can fine-tune sound. They are designed to cancel out certain frequencies, creating a smoother exhaust note. By adding or removing resonators, you can modify the sound further, tailoring it to your preference.
Additionally, the length and routing of exhaust pipes affect sound. Longer pipes can produce a mellow tone, while shorter pipes may yield a sharper, more pronounced sound. The angle of the bends in the exhaust system also influences sound quality; smoother bends promote better flow and minimize turbulence, resulting in a cleaner sound.
Finally, using sound deadening materials around the exhaust can help control unwanted noise. By isolating certain frequencies, you can maintain a sportier tone without excessive cabin noise, optimizing the overall driving experience.
In summary, tuning exhaust sound involves a combination of selecting appropriate components, adjusting pipe size, and modifying routing techniques. By considering these factors, you can create a unique exhaust note that enhances your vehicle’s personality and performance.


