


Regular maintenance is crucial for the longevity and performance of your motorcycle. A well-executed tune-up not only enhances the bike’s efficiency but also ensures a safer riding experience. This article will guide you through straightforward steps to perform a basic motorcycle tune-up that can be done in the comfort of your own garage.
Whether you are an experienced rider or a newcomer to the world of motorcycles, understanding the key components of a tune-up will empower you to keep your bike in top shape. From checking the oil and replacing the air filter to inspecting the spark plugs, each aspect of maintenance plays a vital role in the overall functionality of your machine.
By following these simple steps, you can develop a routine that not only saves you money on costly repairs but also prolongs the life of your motorcycle. Let’s dive into the essential tasks that will ensure your ride runs smoothly and efficiently.
Checking and Replacing Spark Plugs
Regular maintenance of your motorcycle includes checking and replacing spark plugs, which play a crucial role in engine performance. Ensuring that your spark plugs are in good condition can lead to improved fuel efficiency, better acceleration, and smoother rides.
Here are the steps to check and replace spark plugs:
- Gather Necessary Tools:
- Socket wrench
- Spark plug socket
- Torque wrench
- Gap gauge
- Lubricating grease
- Locate the Spark Plugs:
Refer to your motorcycle’s owner’s manual to find the exact location of the spark plugs. They are typically situated on the side of the engine and may require removal of certain components for access.
- Remove the Spark Plug Wires:
Carefully disconnect the spark plug wires by pulling them straight out. Avoid twisting to prevent damage to the wire or connector.
- Check the Condition:
Examine the spark plugs for any signs of wear, such as:
- Cracks in the ceramic insulator
- Buildup of carbon or oil deposits
- Excessive wear on the electrode
- Measure the Spark Plug Gap:
Use a gap gauge to measure the distance between the center and ground electrodes. Verify this measurement against your motorcycle’s specifications. If the gap is incorrect, adjust it by carefully bending the ground electrode.
- Replace if Necessary:
If the spark plugs show significant wear or damage, it’s time to replace them. Ensure you obtain spark plugs that match your motorcycle’s specifications.
- Install New Spark Plugs:
Apply a small amount of lubricating grease to the threads of the new spark plugs. Hand-tighten the spark plugs and then use a torque wrench to tighten them to the manufacturer’s specified torque setting.
- Reconnect the Spark Plug Wires:
Ensure that each wire connects securely to the corresponding spark plug. You should hear a click when they are properly seated.
By regularly checking and replacing your motorcycle’s spark plugs as part of your maintenance routine, you can ensure a smoother and more efficient ride, ultimately extending the life of your engine. Make this an integral part of your motorcycle care to enjoy optimal performance.
Adjusting the Chain Tension
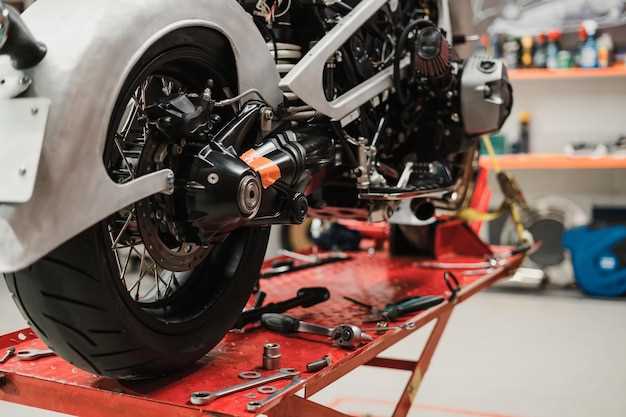
One critical aspect of a motorcycle tune-up is adjusting the chain tension. Proper chain tension is essential for optimal performance, safety, and to extend the lifespan of the chain and sprockets. An improperly adjusted chain can lead to excessive wear, reduced power transfer, and even dangerous riding conditions.
To begin, ensure you have the right tools: a wrench for the axle nut, a chain tension tool or ruler, and possibly a torque wrench for accurate adjustments. First, locate the chain adjustment mechanism, typically found at the rear axle of the motorcycle. Most motorcycles utilize adjusters on either side of the swingarm.
Next, place the motorcycle on a level surface and support it using a stand. This will allow you to measure the chain slack accurately. Using your fingers, check the vertical movement of the chain at the midpoint between the sprockets. For most motorcycles, the ideal slack should be between 1 to 2 inches, but refer to your owner’s manual for the specific measurement.
If the chain slack is outside this range, use the wrench to loosen the axle nut slightly. Then, adjust the tension by turning the adjuster screws on either side of the swingarm. Ensure both sides are adjusted evenly to keep the wheel aligned. After making adjustments, recheck the slack and fine-tune as necessary to achieve the optimal tension.
Once the chain is properly adjusted, securely tighten the axle nut using the torque specifications provided in the manual. Finally, spin the rear wheel to ensure smooth operation and check the alignment of the chain with the sprockets. Performing this adjustment regularly as part of your motorcycle tune-up will help maintain safe and efficient riding conditions.
Flushing and Refilling the Oil

Regular maintenance of your motorcycle includes flushing and refilling the oil to ensure optimal performance. Over time, engine oil can become contaminated with dirt, debris, and breakdown products, reducing its effectiveness.
To start the process, warm up the engine by running it for a few minutes. This helps the oil flow more freely and facilitates the draining process. Once warmed, turn off the engine and prepare your workspace with the necessary tools: an oil catch pan, socket wrench for the drain plug, oil filter wrench, and fresh oil.
Next, locate the drain plug beneath the motorcycle. Place the oil catch pan underneath it, then remove the drain plug with the socket wrench, allowing the old oil to flow completely into the pan. This step is crucial as it eliminates old, degraded oil that could harm engine components.
After draining the oil, remove the old oil filter using the oil filter wrench. Apply a bit of new oil to the rubber gasket of the new oil filter before installing it. This ensures a proper seal and makes future removal easier. Install the new filter securely, then replace the drain plug, tightening it to the manufacturer’s specifications.
Now, it’s time to refill the engine with fresh oil. Use a funnel to pour the recommended type and amount of oil into the oil fill cap. It’s important to consult your motorcycle’s manual for the specific oil requirements.
Once filled, start the engine and allow it to run for a minute. Check for leaks around the filter and drain plug. After ensuring everything is secure, turn off the engine and check the oil level with the dipstick or sight glass, adding more oil if necessary.
Flushing and refilling the oil is a straightforward task that significantly contributes to your motorcycle’s longevity and performance. Regularly performing this maintenance can help avoid costly repairs in the future.


