


Restoring your ATV seat upholstery can breathe new life into your vehicle and enhance your riding experience. Over time, the constant wear and tear can lead to damage, discoloration, and loss of comfort. This guide will walk you through the process of repair and replacement of your ATV seat upholstery, ensuring that it looks great while providing the necessary support for your adventures.
The first step in this project is to assess the condition of your current seat. If the foam underneath is damaged or compressed, it’s important to address that before applying new upholstery. Proper foam will not only improve comfort but also prolong the lifespan of your new covering. By evaluating the state of the foam and making necessary repairs, you can ensure a solid foundation for the seat restoration.
Once you’ve dealt with the foam, the next phase involves selecting quality materials for the upholstery. Choosing the right replacement fabric can have a significant impact on durability and aesthetics. Whether you prefer a sleek vinyl finish or a more breathable fabric, understanding your options is crucial for achieving the desired look and function. With the right preparations, you’ll be ready to transform your ATV seat into a comfortable and visually appealing feature of your vehicle.
Assessing Damage and Planning Your Repair Strategy
Before initiating the restoration of your ATV seat upholstery, it is crucial to carefully assess the extent of the damage. Begin by inspecting the seat for any visible signs of wear, such as cracks, tears, or fading. Determine whether the damage is superficial or requires more extensive repair work. Use a flashlight if necessary to reveal any underlying issues that may not be immediately visible.
Next, you should categorize the damage into two primary areas: the upholstery material and the seat base. If the upholstery is torn or worn, consider whether a simple patch or complete replacement of the fabric is necessary. For minor tears, patching may be a quick and effective repair, while larger rips might warrant complete upholstery replacement.
Assess the seat base for any structural issues, such as broken supports or damaged foam. If the foam is compromised, replacing it can greatly improve comfort and longevity. Prioritize repairs based on the severity of damage, ensuring that you address all underlying issues before proceeding with upholstery replacement.
Once you have thoroughly evaluated the damage, develop a detailed repair strategy. List all the materials you will need, including replacement fabric, adhesives, and tools required for your repair. Make sure to choose high-quality materials that match your ATV’s specifications to ensure durability and aesthetic appeal. Planning your repair meticulously will streamline the restoration process and lead to better results.
Replacing Foam Padding for Comfort and Support
Replacing the foam padding in your ATV seat is essential for enhancing comfort and support during rides. Over time, the original foam can become compressed, damaged, or develop imperfections, impacting your experience. This guide will walk you through the necessary steps for effective replacement.
First, gather the necessary tools and materials. You will need a utility knife, measuring tape, a new foam padding sheet, adhesive spray, and a staple gun. The choice of foam is crucial; look for high-density foam suitable for seating to ensure durability and comfort.
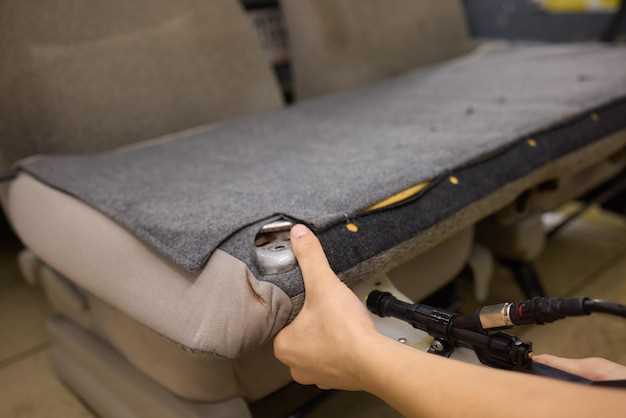
Begin by removing the seat from the ATV. Carefully detach any screws or fasteners securing the seat to the frame. Once removed, examine the seat cover and remove it by pulling out staples or unzipping, depending on the design.
Next, take measurements of the existing foam. Use the measuring tape to determine the length, width, and thickness of the old padding. These measurements are crucial for cutting your new foam accurately. Once measured, transfer these dimensions onto your new foam sheet and use a utility knife to cut the foam accordingly.
Before attaching the new padding, prepare the seat base. Clean it thoroughly to ensure that the adhesive will adhere properly. Apply adhesive spray to the base and the new foam, allowing it to become tacky before placing the foam onto the seat. Press down firmly to ensure a secure bond.
Once the foam is in place, reattach the seat cover. Depending on the design, use a staple gun to secure the cover tightly over the new foam. Ensure there are no creases or loose areas to maintain a professional appearance.
Finally, reinstall the seat onto the ATV using the same screws or fasteners. Ensure everything is secure and inspect your work. With the new foam padding in place, you should notice improved comfort and support during your rides.
Reupholstering Techniques for a Professional Finish
To achieve a professional finish when reupholstering an ATV seat, it is essential to utilize effective techniques that ensure durability and aesthetics. Start by carefully removing the old upholstery and inspecting the seat frame for any signs of damage that may require repair. A stable foundation is crucial for the replacement process.
When selecting materials for the new upholstery, choose high-quality fabrics and foams specifically designed for outdoor use. These materials provide better resistance to weather elements and wear over time. Be sure to accurately measure the seat dimensions to cut your new upholstery material precisely. This step minimizes excess fabric and creates a cleaner look.
For attachment, consider using a staple gun to secure the new fabric to the seat base. Ensure the fabric is taut to avoid wrinkles or sagging. It is also important to start from the center and work your way outwards while pulling the fabric tightly. This technique helps distribute tension evenly and contributes to a smooth, professional appearance.
Finally, finish the edges of the upholstery with caution, using either trim or piping to provide a polished look. In addition, pay attention to the details such as properly aligning patterns or textures in the fabric, which enhances the overall aesthetic of the seat. By utilizing these reupholstering techniques, you can achieve a high-quality result that not only repairs the seat but elevates the appearance of your ATV.


