


Upgrading your vehicle’s instrument panel can significantly enhance both its aesthetics and functionality. A custom dash and speedometer setup not only provides a modern look but also improves the accuracy of your driving information. This guide is designed to walk you through the process of installing a new dash and speedometer, ensuring you achieve the best results for your vehicle.
The installation process starts with understanding the various types of gauges available in the market. Whether you’re looking for analog, digital, or a combination of both, selecting the right gauge that fits your dashboard layout is crucial. Each type offers unique features and styles, so it’s important to consider how these will complement your car’s interior.
Once you have chosen your gauges, the next step involves the installation process itself. Installing a new dash and speedometer may seem daunting, but with the right tools and guidance, you can achieve a professional-looking result. This guide will cover the necessary steps to ensure that your new install functions correctly and enhances your driving experience.
Choosing the Right Custom Dash for Your Vehicle
Selecting the appropriate custom dash is essential for enhancing both the functionality and aesthetic of your vehicle. Start by identifying the specific needs of your car, including its make, model, and year. These factors heavily influence the compatibility of the dash you choose. Ideally, the dash should align seamlessly with the interior of your vehicle, creating a cohesive look.
Next, consider the type of gauges you will be installing. Custom dashes come with various gauge options, from analog to digital displays. Think about what provides you the most convenience and visibility based on your driving habits. Ensure that the gauges included meet your requirements for accuracy and readability.
Furthermore, evaluate the materials used in the custom dash’s construction. High-quality materials not only guarantee durability but also contribute to the overall appearance. Look for dashes made from materials that can withstand the rigors of daily driving while still offering aesthetic appeal.
Another critical aspect is the ease of installation. Some custom dashes are designed for straightforward installation, while others may require professional help. Determine your skill level and consider whether you will need additional tools or resources to complete the installation process effectively.
Lastly, don’t forget to think about the customization options available. Many manufacturers offer a variety of styles, colors, and finishes. Choose a design that reflects your personal taste while also maintaining functionality. By carefully considering these factors, you can ensure that the custom dash you choose not only enhances your vehicle’s performance but also adds a personal touch to your driving experience.
Step-by-Step Process for Gauge Removal and Installation
Before starting the installation process, ensure that you have the necessary tools such as screwdrivers, pliers, and a wiring harness adapter for your custom dash.
Begin by disconnecting the vehicle’s battery to prevent any electrical shorts during the installation. Locate the screws or clips that secure the dashboard panel. Carefully remove them to access the gauge cluster.
Once you have removed the dashboard panel, detach the gauge cluster by unscrewing or uncliping it from its place. Pay attention to the wiring connected to the back of the gauges; take note of how the wiring is arranged for easier installation later.
Carefully disconnect the wiring harness from the old gauges. If you are upgrading to a custom speedometer or gauge, compare the old and new wiring to ensure compatibility. Use wiring diagrams if available to guide you through this process.
Now, take the new gauges and connect them to the wiring harness. Follow the diagram or manual that came with your custom dash to ensure that each wire is connected correctly. Secure the connections to avoid any disconnections while driving.
Once all connections are made, gently place the new gauge cluster back into the dash and secure it with screws or clips. Make sure it fits snugly and is aligned properly with the dashboard openings.
After securing the gauge cluster, reattach the dashboard panel by fastening the screws or clips you previously removed. Check for any gaps and ensure everything is aligned well.
Finally, reconnect the vehicle’s battery and power on the ignition to test the functionality of the new gauges. Verify that all indicators are operating correctly before finalizing the installation. If everything checks out, your new custom dash and speedometer are now successfully installed!
Troubleshooting Common Issues After Dash Installation

After installing a custom dash and speedometer, you may encounter several issues that can affect the performance and functionality of your vehicle’s dashboard. Here are some common problems and their solutions.
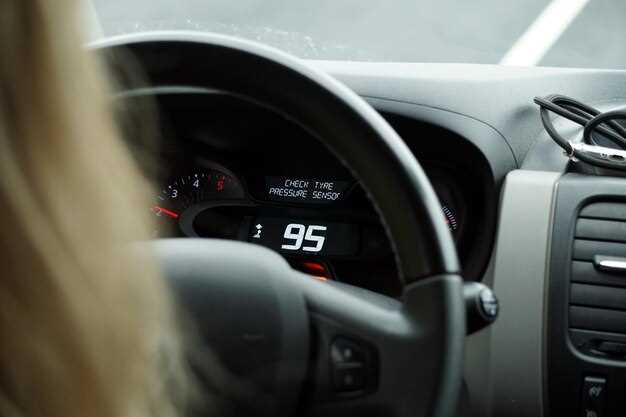
1. Inaccurate Speed Readings
If your speedometer is not displaying accurate readings, ensure that the speed sensor is properly connected. Check the wiring and make sure there are no loose connections. Additionally, verify that the correct calibration settings are applied for your vehicle model.
2. Warning Lights Not Functioning
After a dash install, some warning lights may remain illuminated or fail to turn on. First, confirm that all bulbs are in working condition. Then, inspect the harness connections to ensure that they are securely fastened to the dashboard components. If issues persist, consider using an OBD-II scanner to check for any diagnostic trouble codes (DTCs) that may indicate underlying issues.
3. Flickering or Dimming Display
A flickering or dim display can be a sign of inadequate power supply to the dash. Check the power and ground connections from the vehicle’s ignition switch. Additionally, inspect for any damaged wiring that could be causing voltage fluctuations.
4. Non-Responsive Gauges
If gauges are not responding, examine the connections for the gauge wiring. Each gauge should be connected correctly according to the wiring diagram for your custom dash. If necessary, refer to the installation manual for proper installation procedures.
5. Software Issues
Some modern dashes come with integrated software. If you’re experiencing glitches, try resetting the system by disconnecting the battery and waiting a few minutes before reconnecting. Ensure that any software updates have been installed to improve performance and fix bugs.
6. Physical Fitment Problems
If your dash does not fit properly after installation, review the installation process and compare it against the manufacturer’s specifications. Ensure that all mounting brackets are securely attached and that the dash is properly aligned with the original dashboard layout.
By addressing these common issues systematically, you can ensure that your custom dash installation functions smoothly and effectively enhances your driving experience.


