


Taking care of your ATV is essential to ensure its longevity and optimal performance. One of the primary maintenance tasks is changing the oil, which helps to keep the engine clean and running smoothly. Regular oil changes reduce engine wear and prevent costly repairs down the line.
In this guide, we will walk you through the step-by-step process for changing the oil on your ATV. Whether you are a seasoned mechanic or a novice, these clear instructions will help you conduct an efficient oil change and maintain your vehicle in top condition.
Gathering the right tools and materials is crucial before you start the oil change. From the correct type of oil to the necessary implements, being well-prepared will make the job easier and more enjoyable. Follow these steps to ensure your ATV continues to perform at its best, and bring the thrill back to your ride.
Choosing the Right Oil for Your ATV

When it comes to maintaining your ATV, selecting the correct engine oil is crucial for optimal performance and longevity. The right oil ensures that your engine operates smoothly and efficiently, reducing wear and tear over time. Begin by consulting your owner’s manual, which provides specific recommendations regarding oil type and viscosity suitable for your ATV model.
ATV oils are generally categorized into two types: mineral and synthetic. Mineral oils are derived from refining crude oil, while synthetic oils are chemically engineered for superior performance. If you prioritize high performance, particularly in extreme temperatures or demanding conditions, synthetic oil may be the better option. It provides enhanced protection and stays stable longer compared to mineral alternatives.
Pay attention to the viscosity rating, which indicates how well the oil flows at different temperatures. Common viscosity ratings for ATVs include 0W-40, 10W-30, and 20W-50. Selecting an oil with the appropriate viscosity rating for your engine ensures that it can adequately protect its components during temperature changes and varying loads.
Moreover, consider whether the oil meets the necessary API (American Petroleum Institute) standards. Look for the API service symbols on the oil container, ensuring compatibility with your ATV’s engine requirements. Choosing oil that is specifically formulated for four-stroke or two-stroke engines is essential, as these engines operate differently and require oils suited to their unique needs.
Regular oil changes are vital for engine care and performance. Depending on your ATV usage, adhere to the maintenance schedule outlined in your manual. Frequent oil changes not only enhance engine life but also contribute to better fuel efficiency and overall riding experience. Take your time to research and select the right oil; it’s a small investment that pays off in the long run.
Tools and Equipment Needed for an Oil Change
To successfully perform an oil change on your ATV, having the right tools and equipment is crucial for ensuring the process goes smoothly and your vehicle is well taken care of. Here’s a list of essential items you’ll need:
1. Oil Filter Wrench: This tool is designed to help you easily remove the oil filter, which can often be tight and hard to grip by hand. A proper oil filter wrench will make this task efficient.
2. Socket Set: A good quality socket set is necessary for removing bolts and screws that may hold the oil pan in place or secure the drain plug. Make sure to have various sizes to accommodate your ATV’s specifications.
3. Drain Pan: An adequate drain pan will catch the old oil as it drains from the engine. It is essential to choose a pan that can hold the quantity of oil specific to your ATV model.
4. Funnel: Using a funnel when adding new oil will prevent spills and ensure an easier transferring process. This tool is especially helpful to avoid any mess during oil change.
5. New Oil: Selecting the right type of oil for your ATV is crucial. Always refer to the owner’s manual for the recommended oil specifications to ensure optimal performance.
6. New Oil Filter: It’s important to replace the oil filter every time you change the oil. A new filter will help keep your engine clean and functioning properly.
7. Rags or Paper Towels: Keep some rags or paper towels handy for cleaning up any spills or wiping off tools and components during the oil change process.
8. Torque Wrench: This tool ensures that any bolts are tightened to the manufacturer’s specifications when replacing the drain plug or oil filter, which helps prevent leaks.
9. Safety Gear: Don’t forget gloves and safety goggles to protect yourself from oil splashes and sharp components during the change.
Having these tools and equipment ready will make the oil change process more efficient and help in maintaining the longevity of your ATV. Proper care in this routine task ensures that your vehicle runs smoothly and reliably.
Step-by-Step Process for Changing ATV Oil
Changing the oil in your ATV is a critical aspect of engine care that ensures optimal performance and longevity. Follow these steps to complete the oil change efficiently.
1. Gather Materials: Before starting, collect all necessary supplies including fresh oil, an oil filter, a wrench, an oil pan, a funnel, and a cleaning cloth. Refer to your ATV’s manual for the correct type of oil and filter specifications.
2. Prepare the ATV: Park your ATV on a flat surface and turn off the engine. Allow it to cool if it has been running. This will prevent burns and ensure safety during the oil change process.
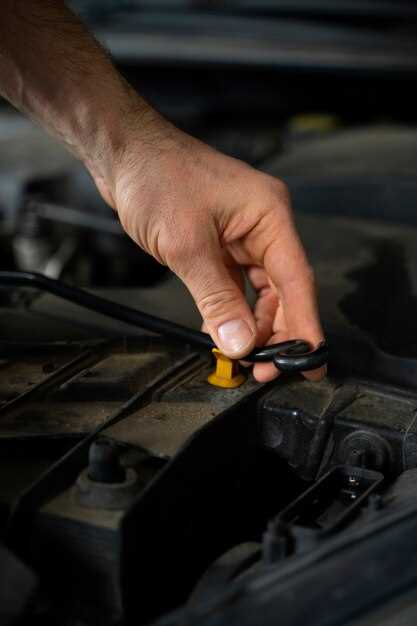
3. Locate the Oil Drain Plug: Find the oil drain plug beneath the engine. Use a wrench to loosen and remove it, and position the oil pan underneath to catch the old oil as it drains out.
4. Drain the Old Oil: Let the old oil completely drain from the engine. This may take several minutes. While the oil is draining, check for any signs of metal shavings or contaminants which may indicate engine problems.
5. Replace the Oil Filter: Locate the oil filter and use an oil filter wrench to remove it. Before installing the new filter, apply a small amount of fresh oil to the rubber gasket on the new filter. This helps create a better seal. Install the new oil filter securely.
6. Replace the Drain Plug: Once all the old oil has drained, replace the drain plug and tighten it securely. Ensure there are no leaks when you start the engine.
7. Add New Oil: Using a funnel, pour fresh oil into the engine through the designated filler cap. Refer to your owner’s manual for the correct oil capacity to avoid overfilling.
8. Check the Oil Level: After adding oil, wait a few minutes and then check the level using the dipstick. Add more oil if necessary until it reaches the recommended level.
9. Run the Engine: Start the ATV and let it run for a few minutes. This allows the new oil to circulate throughout the engine. Check for any leaks around the drain plug and oil filter.
10. Dispose of Old Oil Properly: Transfer the used oil into a sealed container and take it to a recycling center or an approved disposal facility. Never dispose of oil in the environment.
By following these steps, you will ensure that your ATV receives the care it needs to operate efficiently, extending the life of its engine.


