


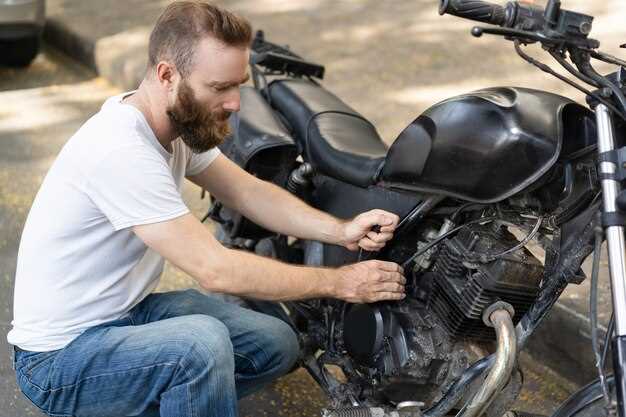
Maintaining the brakes of your motorcycle is crucial for ensuring your safety on the road. Worn brake pads can significantly compromise your stopping power, leading to potentially dangerous situations. Understanding when and how to replace these essential components is vital for every motorcycle owner.
Brake pads play a pivotal role in the braking system, providing the friction needed to slow down or stop your motorcycle efficiently. Over time, due to regular wear and tear, these pads can become thin and less effective, which not only affects performance but can also cause damage to the brakes themselves if not addressed promptly.
This guide will walk you through the steps of identifying worn brake pads, understanding the signs that indicate it’s time for a replacement, and providing a detailed process for safely installing new pads. By equipping yourself with this knowledge, you can ensure your motorcycle remains safe and responsive for years to come.
Identifying Signs of Worn Brake Pads
Recognizing the signs of worn brake pads is crucial for maintaining optimal braking performance on your motorcycle. One of the primary indicators is a squeaking or squealing noise when applying the brakes. This sound often results from a wear indicator built into the brake pads, alerting you that replacement is necessary.
Another significant sign is reduced braking efficiency. If you notice that your motorcycle takes longer to stop than usual or if the brake lever feels spongy, your disc brake pads may be worn. This decline in performance can compromise your safety and should be addressed immediately.
Additionally, inspecting the thickness of the pads can provide clear evidence of wear. Most pads are designed with a minimum thickness; if they have worn down significantly, it’s time to replace them. A visual check of the brake disc can also reveal damage, such as scoring or uneven wear, which may indicate that your pads need attention.
Furthermore, if you experience a vibration or pulsation in the brake lever during application, this may point to worn pads that have uneven surfaces. Keeping an eye on these signs will ensure your motorcycle’s braking system remains effective and safe for riding.
Step-by-Step Process for Replacing Brake Pads on Disc Brakes
Replacing the brake pads on your motorcycle’s disc brakes is essential for maintaining optimal stopping power and ensuring your safety on the road. Follow these steps to perform the replacement effectively.
1. Gather Necessary Tools and Materials
You will need a socket set, a torque wrench, a flat-head screwdriver, replacement brake pads, and brake cleaner. Ensure you have a clean workspace.
2. Prepare the Motorcycle
Start by placing your motorcycle on a stable, level surface and use a motorcycle stand if available. This will allow easier access to the wheels and brake components.
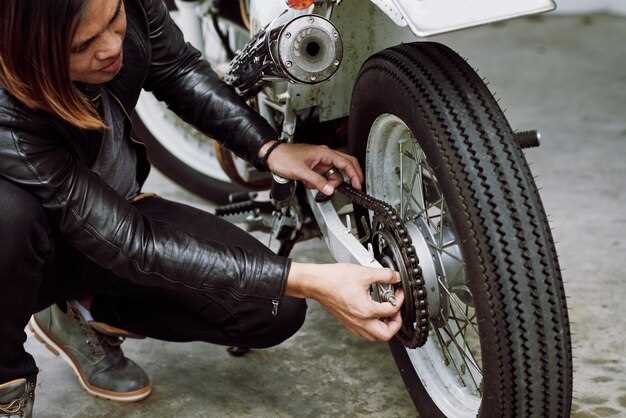
3. Remove the Wheel
Loosen the axle nut using a socket wrench and carefully remove the wheel from the motorcycle. Make sure to support it so it doesn’t fall.
4. Access the Brake Caliper
Locate the brake caliper attached to the wheel. Remove the bolts securing it to the mounting bracket with a socket wrench, then carefully slide the caliper off the brake rotor.
5. Remove the Old Brake Pads
Inspect the caliper to locate the retaining clips or pins. Remove them to free the old brake pads. Take note of the orientation for reinstallation.
6. Clean the Caliper
Use brake cleaner to eliminate dust and debris inside the caliper housing. Ensure all old pad material is cleared away to promote better contact with the new pads.
7. Install New Brake Pads
Insert the new brake pads into the caliper in the same orientation as the old ones. Ensure they fit snugly and properly align with the rotor.
8. Reattach the Caliper
Slide the caliper back onto the rotor and secure it by tightening the bolts to the manufacturer’s specified torque using a torque wrench.
9. Reinstall the Wheel
Align the wheel with the brake caliper and insert the axle. Tighten the axle nut securely, ensuring the wheel rotates freely without any binding against the caliper.
10. Test the Brakes
Before riding, pump the brake lever several times to seat the new pads against the rotor. Check for any unusual noises or issues.
11. Final Checks
After testing, confirm that all components are securely attached and that there are no leaks or abnormalities in the brake system. Check the brake fluid level and top off if necessary.
Replacing worn brake pads on your motorcycle is a straightforward task that enhances safety and performance. Regular maintenance ensures reliable performance of your disc brakes.
Tools and Materials Needed for Brake Pad Replacement
To successfully replace the brake pads on your motorcycle, it is essential to have the right tools and materials at hand. This will ensure a smooth and efficient process, while also maintaining the integrity of your braking system.
Tools:
- Socket Set: A comprehensive socket set is necessary for removing bolts and fasteners. Make sure to include the appropriate sizes for your motorcycle’s brake caliper.
- Torque Wrench: This tool is crucial for applying the proper torque when reassembling the brake components, ensuring safety and performance.
- Brake Pad Spreader: This device helps push the caliper pistons back into their housing, making it easier to fit the new brake pads.
- Hex Wrenches: Many motorcycles use hex bolts on their brake calipers. A good set of hex wrenches will allow you to remove and replace the necessary components.
- Screwdrivers: Flat-head and Phillips screwdrivers will be needed for securing various covers or components around the brake assembly.
Materials:
- New Brake Pads: Ensure you select high-quality pads that are compatible with your motorcycle’s make and model. Different pads are designed for specific braking performance, either for street or track use.
- Brake Fluid: Replacing brake pads may require a brake fluid change. Have the recommended fluid type ready to maintain your hydraulic braking system’s efficiency.
- Clean Cloths: Use lint-free cloths for cleaning the brake components and removing debris, oil, or old brake fluid from the disc and caliper.
- Brake Cleaner: A good brake cleaner will help prepare the disc and caliper surfaces for optimal contact with the new pads.
- Anti-Seize or Lubricant: A small amount of anti-seize compound or lubricant can be applied to the pad backing to reduce noise and ensure smooth operation.
Having these tools and materials prepared before starting the brake pad replacement process will not only save time but also enhance the overall effectiveness of your motorcycle’s brake system.


